Sunday, April 26, 2020

let's make little drawers

Hello! I hope that everyone is doing well! The Sunday Let's Make series continues with a project from the Tinkering Archives.


When I first blogged about this tinkering endeavor, I named the project and blog post le petit tiroir – which very roughly translates to the little drawer in Google French.


You will need:
Glue
Embellishments
Scissors
Small matchbox
Paper/fabric scraps
Ribbon, trimming

How to:
While the book outlines a series of five steps {click to enlarge image}, basically you are wrapping the outside cover of a matchbox with paper of fabric. You may also line the inside "drawer" with paper or fabric, and dot the "drawer" front with a flat bead or other embellishment. A large matchbox will also work.


This trio is part of the set created for my first book. I like to tie a piece of vintage seam binding into a bow and tuck something inside, like a sprig of millinery flowers; the top matchbox is adorned with one of my Nana's clip-on earrings.


I love how the matchboxes were styled and even landed the book cover.


Print-out little messages to tuck inside, especially if giving as part of a gift. The little drawers make nice boxes for gifting earrings...


or pretty beads and other tiny presents!

Other paper ideas:
Comic book
Gift wrap
Take-out menu
Magazine page
Map
Scrapbook paper

Happy tinkering + please stay safe at home + well!

xo
elyse

*Looking for copies of my books? Please consider first checking your local independent bookstore or try Barnes & Noble before buying from a big retailer like Amazon. Shop small, buy local.


Sunday, April 19, 2020

let's make bottle cap magnets

Hello! I hope this blog post finds everyone feeling well. Today's project revolves around bottle caps and ideas how to tinker them into something pretty. Don't let the long list of supplies scare you away, this project can be as simple as you want it to be.


You will need:
Bottle caps
Glue
Magnets
Math compass
Paper
Scissors or paper punch
White glitter


In a nutshell {or bottle cap} you want to cut a circle from decorative paper and place into the bottle cap. For a perfect fit, use a math compass.


If using a math compass: Create a fine line and cut out your circle from paper.


If you have this 1-inch scalloped hole punch from Martha Stewart Crafts it creates the perfect insert.


Dab a tiny bit of glue inside the cap before inserting the paper circle to fix in place. If you want to add glitter, swipe some glue over the paper insert, sprinkle glitter on, and then shake off.


And now you have your lovely bottle cap!


Here is how it appeared all styled and photographed in Tinkered Treasures* {page 64}. To turn your bottle cap into a magnet, glue a magnet to the back. Look through your "junk drawer" – chances are good that you have some flimsy free magnet that you can repurpose for this project.

Other ideas
Use to decorate a flat picture frame
Line the flat face of a shelf
Turn into jewelry, perhaps a pin

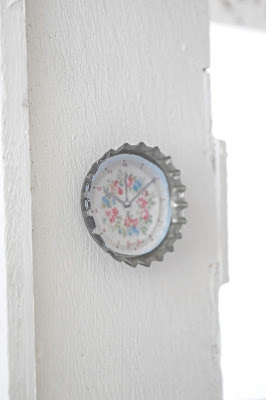
Make a miniature wall clock


Download and print-out or draw a clock face on paper and insert into a bottle cap.


It won't keep time but who cares!

Happy tinkering + please stay safe at home + well!

xo
elyse

*Looking for a copy? Please consider first checking your local independent bookstore or try Barnes & Noble before buying from a big retailer like Amazon. Shop small, buy local.

PS
Follow me on Instagram at elyse.press.major and be sure to click on "chick flix" at my Stories for a giggle!

Sunday, April 12, 2020

let's make napkin holders

Hello! I hope everyone is doing well. Life in quarantine is casual for the most part but I always feel better about myself and life in general when making even the slightest effort toward normalcy. Little acts like wearing earrings, putting on blush, even setting the table. Today, let's make napkin holders, even if they're for paper napkins for dinner on the couch.


You will need:
Images of vintage seed packets
Decorative paper
Thin cardboard
Glue stick
Scissors
Ruler
Pen for making creases
Baker’s twine (or yarn)

Find + print images
Look online for images of vintage seed packets. Here are some that I collected. Just click and download.


Upload into a word processing program and experiment with sizing before printing out.


Build a base
You are essentially constructing the rigid sleeve of a matchbox cover. Determine a standard size (approximately 2.5” x 3.5” shown) and use cardboard that is sturdy yet pliable (think: inserts that come with calendars or pressed shirts, even a cereal or cracker box). The first napkin holder can be tricky so after it's all set you can use it as a template for the others. Sharpen folds with a pen.


Once the base is all set, cover with decorative paper.


Glue the seed packet image to the top cover and trim to fit, if needed.


Complete by tying with a piece of baker’s twine around the box in a bow.


Ready, set, dine
Stuff holder with a napkin and cutlery. Assemble a cheerful table setting using scraps of fabric as napkins, a floral sheet for a table cloth, sprigs of flowers or twigs from outside, mismatched party ware – it all works!


And if fashioning a folded holder isn't your bag, just make a paper loop around the napkin and cutlery and tape together – fast-food restaurant style – but with charm!


This project was developed for the Spring 2015 issue of Cottage Gardener magazine.

Happy tinkering + please stay safe at home + well!

xo
elyse

PS
Follow me on Instagram at elyse.press.major and be sure to click on "chick flix" at my Stories!

Sunday, April 5, 2020

let's decorate jars

Hello! It's been a long time since I've blogged regularly and I hope that you're enjoying these Sunday updates as much as I do creating them. If you're a first time visitor here's a little recap. The past two projects have been made from emptied tin cans (pencil cup, luminary); today I thought we'd venture into jelly jars!


You will need
Jars

My favorite jars for tinkering are from Bonne Maman preserves. I like the short shape, gingham lids, and best of all, their labels easily slide off with a soak in warm soapy water. Of course, any glass jar will do.


Embellishing a jar can be as simple as tying a scrap of ribbon around its base.

You will need
Jar
Ribbon
Scissors

• • •


Embellishing a jar can be as involved as painting the lid and topping it with a circle of paper with a new label to match.* Seal top with decoupage medium.

You will need
Jar
Decoupage medium (Mod Podge)
Foam brush
Glue stick
Paint (craft, spray, leftover house paint)
Paper
Scissors

• • •


This jar simply has a torn piece of fabric glued to the front.

You will need
Jar
Fabric
Glue stick
Scissors

• • •


I use jars in the Girlie Office to display small supplies. For this project, upload a floral fabric image and size to fit a mailing label, add text on top in an unfilled box, and print to create pretty labels**; trim sides with a scallop-edged scissors if you have one handy. Use label scraps to cover the lid.

You will need
Jar
Word processing program
Scallop-edged scissors
Sheet of adhesive mailing labels


Happy tinkering + please stay safe at home + well!

xo
elyse

PS
Show me your projects by tagging #tinkeredtreasures or #tinkereverything on Instagram

Using the book Tinkered Treasures, CICO Books
{search your favorite bookseller or library}:
*Tinkered Treasures - Tinkering Recyclables - Relish Jars, p. 72
**Tinkered Treasures - Getting Started - Making Pretty Paper & Pretty Labels, p. 16