Saturday, April 22, 2017

flower fangirl


My friend Lorraine introduced me to the term "fangirl," which Merriam-Webster defines as a girl or woman who is an extremely or overly enthusiastic fan of someone or something. While new-to-me, M-W cites 1934 as its first known use. Why all this fangirl talk? Because I've decided that I'm a fangirl of flower professionals be they farmer or florist.
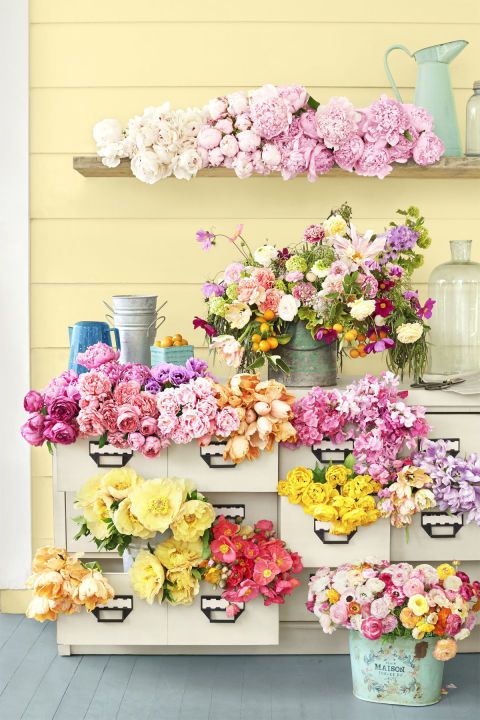
Kiana Underwood of Tulipa featured in Country Living, April 2017
I follow floral design studios like Tulipina on Instagram, seek flower farms to visit, and take workshops for the simple pleasure of being surrounded by colorful petals. I don't think about the sweat of running a business dependent on weather or deliveries, I just imagine days spent snipping stems and filling vases, surrounded by beauty and ribbon and smiles.

Earth Day is the perfect day to share a list of regional flower industry favorites. Website links are included and can provide all the basic information you need so I'll just share thoughts about what makes these places so special to me.

Wicked Tulips Flower Farm, Johnston, Rhode Island


If you're in the Rhode Island area and you're reading this today (late April) or in the next few weeks, consider planning a trip ASAP to Johnston (about twenty minutes north of Providence) where tulip farmers Jeroen and Keriann Koeman have turned a quiet patch of land into a tourist destination seemingly overnight.


Almost immediately after learning about Wicked Tulips last winter, I contacted the owners and became a volunteer. My favorite job is wrapping armfuls of tulips in kraft paper on the white tables beneath the tents, especially the 4 o'clock shift when there's a good chance to witness a brilliant sunset over the cheerful rows of thousands and thousands of hardy tulips. Visit WickedTulips.com.

Dame Farm & Orchard, Johnston, Rhode Island


Across the road from the tulip farm is Dame Farm and around July their field of sunflowers is a spectacular site.


I'm also a huge fan of zinnias and so I'll be sure to visit during the heat of the summer. Visit DameFarmandOrchards.com.

Cape Cod Lavender Farm, Harwich, Massachusetts


I love spending time on Cape Cod and my guys know that before go-karts and after taffy, there's going to be a trip to the lavender farm. It is a truly magical spot with a cottage shop -- the interior outfitted strands of violet fairy lights overhead -- open 24-7 on the honor system.


In addition to waving fields of purples, there is a path that leads to a miniature medieval castle and "enchanted" garden. Visit CapeCodLavenderFarm.com. Related blog posts: field trip; boho style.

Morrice Florist, Vineyard Haven, Massachusetts


I've been following Morrice Florist on Instagram and so when I took a daytrip last summer to Martha's Vineyard, I really wanted to stop by. Little did I realize that Morrice's also carries wonderful paper and home decor lines. Owner Emily Coulter, has "the mojo" and her shop is breathtaking, reminiscent of Terrain, but with more character and heart.


Last month I orchestrated a sisters' trip based around attending one of her monthly workshops and let me tell you, it was dreamy! A reporter from The Martha's Vineyard Times was in attendance and wrote all about it in her piece Women, wine, and flowers. Visit MorriceFlorist.com.

Plant Nite Cape Cod


Just last week my friends and I attended a Plant Nite event, kind of a mobile Tupperware party held at a restaurant function room where attendees can sip and snip and leave with a living project.


Ta-da! That's Lorraine, Cindy, and me with our wooden box terrariums of succulents. A very enjoyable evening! Visit PlantNite.com.

Flowers by Semia, available at Ellies Bakery, Providence, Rhode Island


Everything about Ellie's makes me happy, everything has a special touch. The staff is always friendly for reals, the serveware is so Parisian, and the displays of baked goods are as tasty as they are pretty. Thursday through Sunday, Ellie's offers bouquets from Flowers by Semia: inspired bursts of color wrapped in brown paper and tied with wide ribbon. Flowers, coffee, and a slice of whatever looks yummy = pure indulgence! Visit ElliesBakery.com; visit FlowersbySemia.com.

The Greenery, Warren, Rhode Island


Awesome owner Bridget Tierney has a cool shop on historic Water Street filled with flowers, home accents, soaps and more, and she's open to doing workshops -- just ask her! Visit ShopJust.com.

Back at My Backyard


As for me, I'm no green thumb. My favorite weather is when it’s bright and sunny with a slight chill in the air, just enough for a light cardigan. That’s when you’ll find me outside staring at my neglected lawn, plotting and planning and even venturing to a nursery for containers of bright flowers, perhaps even some leafy, fragrant herbs. But alas, in New England, those glorious conditions are short-lived and precarious. Once I break a sweat and must swat away a few bugs, I’m out, or should I say, in: inside with the air conditioning on. See those flowers in the window box? Um, they're fake, or shall I say faux.


Good ol' buttercups and the lilies of the valley that appear each year! I do enjoy playing florist! On special occasions the Hubs brings me a bucket of market flowers from which I tinker an assortment of arrangements.


And of course tinkering bottles, jars and cans into vessels to hold real flowers.


Happy Earth Day and thanks as always for reading!

xo
elyse


Saturday, February 25, 2017

tinkering the bathroom floor, part I


Not long after taking on the steps project I begin leering at the floor of our only bathroom.


The stone tile floor never looked or felt clean.


Feeling emboldened from completing the steps project and left with enough white floor paint to get started, I was off and running, or kneeling uncomfortably and stretching, but you get the idea ...


Note the flamenco shower curtain tucked-in with ruffles rising from the blowing fan used to dry the floor between coats of paint. A few months later I have no regrets, however while the white floor opens the space visually, it's no hiding place for daily wear and tear and could benefit from some color and pattern to mix things up. I clicked over to Pinterest and while dazzled by a myriad of images, was having trouble visualizing how any of them would work for my postage stamp sized floor. So, I did a little tinkering ...


I imported an image of the bathroom into a Word document and went to Remove Background. This is my simplified work-around of a Photoshop feature.


Next, I marked the areas to remove as well as the sections to keep. Once I had successfully removed the floor from the photo, I Saved As a PNG. With the floor removed, I could now insert all kinds of images pinned to my steps + floors board to get a sense of how they might look. I did this at PicMonkey > Design > Add your own overlay.
While not a perfect system, I found this very helpful in ruling out certain ideas like bringing in bright yellow or papering the floor in a busy floral print.


All images are Click to Enlarge

I believe I have come up with a winner -- the largest square shown above! My idea is to use the existing bathroom tile to create a checkerboard pattern in blocks of four, using a color scheme similar to the one pictured. Once finished, I'll protect well with a sealant meant for floors (that's research for another day, any faves?). Not 100% sure when I'll start the painting ... could be tomorrow morning at 7 a.m., could be next month but I'll be sure to post pics along the way on Instagram, which has become a visual notepad if this is my diary.

I hope this idea helps you in planning a project! Below are selected images from the thumbnails above. I honestly didn't feel like watermarking them so if you share them, please cite me as the source. Many thanks.

Thank you for reading!

xo
elyse


Monday, January 23, 2017

writer's circle


I spent the entire weekend writing, just like last weekend. This is not a complaint, it's a dream come true. I was recently assigned four feature stories for three publications, all home tours from different parts of the United States. There were ranch-style homes in New Mexico and Texas, a Cape/colonial in Minnesota, and a historic Victorian in my home state of Rhode Island. 


The process generally begins with a Starbucks run and my receiving many images or mock layouts of mostly interior shots and interviewing the homeowners by email or phone. I do a lot of research to fill in the blanks for myself and the reader on styles and tips and tricks. My favorite articles are the ones that inspire me to try things in my own home and that's how it all started for me -- with magazines.


When we first bought our home my sole design resource was catalogs until my sister Betsy came to visit and brought along an issue of Creative Home (and I'm pretty sure it was the one pictured above). Each glossy page was filled with simple projects and clever ideas, the writing was succinct and encouraging. It was a game changer for me.


I painted the first floor room we had always designated for my use yellow-on-yellow and altered just about every thing in there. I crackle-painted the coffee table, added ribbons to the window panels, recovered a memory board, among many other things. As soon as the paint was dry to the touch, I excitedly outfitted the room, took pictures and emailed them to Creative Home in response to their "show us your style" call-out.


Within the hour I received a reply to send more pictures and answer a few questions. What a thrill! This was before social media had really exploded (for me, anyway) and so print was king (still is to me). Creative Home has since ceased production but I still have every issue for reference, and I'll never forget how validating is was for me to be included.

So why this rambling rerun of a tale? Because the article I submitted yesterday afternoon for the upcoming issue of Vintage Style was to Debra Wittrup, the same editor of "my" issue of Creative Home, Summer 2008! Crazy, right?!

Whenever I update my portfolio page or find my work on the newsstand, it still feels as exciting and surreal as it did all those years ago. Here's what's out or coming right up:


Thank you for reading and Happy New Year!

xo
elyse


Friday, December 23, 2016

tinkered holiday round-up


Over the years I've had the pleasure of contributing holiday tutorials to Romantic Homes and their Vintage Holiday special issue publications. It's always an absolute treat to see how the words and images I send to them are transformed by their talented team of designers and editors into beautifully designed glossy pages on the newsstand!

By looking at the first pages of each project below you can probably guess how to make them; if you need assistance, just visit me at my tinkeredtreasures page on Facebook and I'm happy to help! All images are click-to-enlarge.


My first holiday "Make It" was Boxing Day where small matchboxes (a favorite project of mine) are decorated with scrapbook paper and printed-and-punched words. This is still one of my all-time favorite features!


Next came New Birds on the Block where birdhouses from the wood craft aisle are fashioned to resemble vintage style putz houses, originally made from paper.


Just Add Salt was a superspecial feature because the mischievous elf landed a spot on the cover!


Yup! There he is in the far-right bubble!


And from this holiday season, Festive Charmers!

In assembling this post I realize that I've done about two dozen tutorials for the Romantic Homes family of magazines! Special thanks to Jacqueline deMontravel, Meryl Schoenbaum, Staci Dumoski, Devlin Smith, Jickie Torres, Elena Oh, and so many more!

Thanks as always for visiting! Wishing you all the best health and happiness this holiday season and beyond!

xo
elyse

Sunday, December 4, 2016

clipping catalogs


I actually enjoy receiving piles of catalogs in the mail around Christmastime. Dog-earring glossy pages showcasing petit fours or party dresses, but I'm especially drawn to classic winter gear. With sub-freezing temps right around the corner, my head is easily turned by rich plaids, snowflakes and cable knit.


I decided to get snippy with my stack of catalogs and make a garland/bunting to infuse these festive patterns and colors into my seasonal decor on the cheap! First I created a template using card stock but this step can be skipped.


Fold magazine page in half, crease well and make two snips away from the fold, creating a triangle. Keep cutting folded triangles until you have enough to fill a length of baker's twine or string. If this doesn't make sense, check out this video.


Place each folded triangle over the twine, give a few light swipes of glue stick (leaving space at the crease to re-position along the line as needed), press together and align well, and smooth flat.


I like to attempt a random pattern by simply grabbing each triangle without studying it first.


This doesn't take long to do and can be adapted to any paper you have handy. Take-out menus, old greeting cards, coloring pages, construction paper -- you name it!


Before you clean-up and ditch all the clippings, tinker a few clothespins. These patterned pegs are perfect (say that 3x fast) for hanging mittens, adding tags to gift bags, displaying holiday cards and more!

The best part about using plaids and snowflakes and cable knit is that these decorations can hang around until its time to pull out the spring clothes!

Thank you for reading! Happy December wishes!!!

xo
elyse


Tuesday, November 22, 2016

holiday decorating tips for hipsters

Thank you to Coastal Connecticut Magazine for inviting me to share ideas on how to cozy-up to winter decorating. Find the original article at coastalconnecticut.com


Ah, the holiday season. The fervor, the sweaters, the panic, the joy, the aftermath—and it all moves faster than a high-speed Acela. Oddly enough, once the New Year rolls around, everyone is ready for winter to end but, really, that’s when it gets cranking. Less daylight hours and unpredictable forecasts tend to keep many of us hunkered down at home after dark (that’s 4:30 p.m. to you and me). So, embrace a little hibernation with what we’re calling holiday decorating tips for hipsters. They actually work, and they are pretty hip.

Add Shine
Boost your surroundings with a little sheen. Indulge in a few glitzy objects you might normally shy away from such as a sequined pillow, bejeweled picture frame, or silver plate chargers. Think beyond red, green, and blue when pairing metallic finishes and instead play with updated mixes such as teal with zinc, silver with aqua for icy coastal chic, or be exotic with purple and gold. Other conscious couplings include platinum and pink, tin with evergreen, and copper with apple. Need inspiration? Look at jewelry to see what you like best.

Sweater Weather
‘Tis the season to get cozy, so be sure to have plenty of textures around. Introduce heavier weights and velvety fabrics into the mix in the form of throws and pillows. Even if you’re not a knitter, you can add homespun appeal over a fireplace, radiator, or window by fashioning a quirky swag from mismatched mittens clipped along a length of yarn. Keep toes warm by scattering and layering fluffy area rugs. Spoil yourself with something faux-furry.

Lighten Up
Nothing elicits magic faster than strings of lights. Inexpensive and in a range of colors and sizes, add them wherever you want to infuse a bit of enchantment. No tree? No problem. Drape lights around a mirror or wall art. Suspend them from ceilings using low-tack tape, outline doorways, and use to fill a large glass bowl or vase. Create drama with red lights, add an old-time glow with gold, or get kitschy and use colored bulbs meant for small, sad trees coveted by boys wearing zigzag sweaters indoors.

Red It
Nothing sets a holiday mood faster than some strokes of red. It’s also a color that can change moods faster than a hungry teenager. Some no-fail combinations:
Red + Brown = Log Cabin
Red + Grey = Stylish
Red + Gold = Victorian
Red + Green = Traditional
Red + Green + a Primary Pastel = Modern Retro
Red + Ivory or White = Scandinavian
Red + Orange = Warmth
Red + Powder Blue = Nautical
Red + Purple = Regal

Get Reflective
It’s been said that a room without a mirror is like an outfit without jewelry. And who needs that? Try bringing in mirrors of varying sizes. If you’re commitment-phobic about hanging things, lean mirrors and even layer a few to bring light and movement to any space. Think outside the tree and hang shiny ornaments from drawer pulls. Mirrored disco-ball ornaments are especially fun when positioned near light sources.

Farm-to-Table
Go the utilitarian route while engaging all of your senses with a strategic trip to the farmer’s market. Construct stunning displays using pomegranates, artichokes and cheerful clementine oranges. Fill large bowls with nuts and keep fresh herbs in small vases. Think of cranberries as an embellishment and use them to dot frosted cakes, freeze into ice cubes, or if you have enough patience, string them the old fashioned way with a long needle and thread.

Brown Paper Packages
Bag the tablecloth and unfurl a sheet of packaging or butcher paper to cover tables. Fill sugar bowls with crayons—especially striking in a singular color or range—as part of your winter-long table setting and enjoy some calming doodling. Boxes of crayons in singular colors are now available at some Hallmark stores and online retailers. Likewise, make indoor luminaries by placing electric votive candles inside lunch bags.

Scavenger Hunt
Before it’s time to completely hibernate, take a walk in the woods or along the shoreline to gather natural elements. You’d be surprised at how much fun getting grade-school crafty can be. Spray-paint your finds in a vibrant color followed by a coating of glue and a roll in glitter; shake-off excess and hang from matching ribbon or use to assemble impressive displays. Find a friend who has bittersweet overtaking their backyard and snip some of the gnarly-pretty stuff and display across long, narrow spaces.

Cabin Chic
Whether it’s Tartan or Prince Charles or Prince Edward, plaid conjures casual, rustic appeal. Use a favorite flannel as your guide to selecting rugged colors to bring into your winter design plan. Got a worn shirt too ratty to donate? Chop off the sleeves and cut to fit over empty tin cans, fasten with twine and use to hold cutlery or flowers. Position the body of the shirt to cover a pillow and secure with hook and loop tape, or get snippy and tear strips for use as napkin holders.

Have a Ball
Sometimes the dream of a White Christmas just isn’t meant to be, but don’t let that dash your spirit. Add your own flurry of white by hot-gluing clear fishing line to cotton balls and hanging from inside window sills, or fold white paper doilies in half and suspend over a line of white string to create a simple bunting.

Get Tropical
Have yourself a Caribbean-inspired hibernation and warm up your digs with hot colors. Still go for the luxurious fabrics for pillows and throws, but skip the muted tones and opt instead for vibrant analogous sprinklings of pinks, oranges, yellows, and turquoise. Seek ornaments in this colorway and make paper chains from paper strips of candy dots or decorative paper meant for scrapbooking.

...

happy thanksgiving wishes!

xo
elyse

Sunday, November 13, 2016

how a dollhouse can become your own design board


An open back allows all to peek right in.An open back allows all to peek right in.
Thank you to Romantic Homes for the opportunity to share about the Tinkered Dollhouse with a guest post; you may also view it at the Romantic Homes blog.

Projects that I’ve dog-eared in magazines or “hearted” on Pinterest are sometimes more aspirational in nature than practical due to cost and structural concerns. But then there’s the dollhouse. The wooden folk Victorian discovered curbside one Trash Eve. Once the interior was washed and primed in white, I had a blank canvas on which to experiment with any design vision I pleased.

Armed with my tinkerer’s credo of foregoing notions of perfection, I didn’t concern myself with scale. I also decided from the start that most furnishings would be hand-made using the simplest of tools and supplies. I happily tasked myself with constructing things such as a bed and couch from craft sticks, an easel from toothpicks, a wall clock from a bottle cap, and a chandelier from twist-ties and beads. I also decorated a few unfinished wood pieces, even papering buttons into dishes.


Sit right down and have a little something.Sit right down and have a little something.
While I admire miniaturists who have painstakingly taken on things such as installing floor tiles piece by piece, I went with a trompe l’oeil approach and used print-outs of favorite things as accents. Features such as the white-washed brick wall, bead board, even a patterned rug, are all simply paper. I replaced the yellowed plastic windows with dotted vellum from the scrap-booking aisle, and skipped fixing a broken riser on the spiral staircase as an homage to my own beloved home with its own list of overlooked repairs.

Before starting each room I considered ideas I’d always wanted to try and the dollhouse began to serve as my own three-dimensional design board. A pink wall, a collage wall, a patchwork wall … they’re now all in the dollhouse. Floral-papered stair risers, a fireplace in the bedroom, floral wallpaper! With the dollhouse, I can truly DIM (do it myself). Install white-washed brick in the bedroom? Done.


A queen size bed is the best fit of courseA queen size bed is the best fit of course.
There are a few miniature pieces like the coffee cup with saucer and spoon given to me by my husband as my talk of bringing the dollhouse upstairs from the basement became a regular topic of conversation. The wooden chair in the dining room is mine from childhood – it belonged to a set where a hollow wooden apple in two parts became a table connected by a stem. Small wineglasses are from my youngest son’s enormous collection of Playmobil toys. Charms, ornaments, tiny favors, and other bits and bobs all add up to lovely little sentimental decor.

With the inside pretty much finished, I’m beginning to set my sights on the exterior. I’m perusing houses in Martha’s Vineyard, MA and Cape May, NJ for inspiration. Once again my research is all about the wish list which means there will be window boxes – perhaps made from craft sticks and most likely filled with vintage millinery forget-me-nots – and the dusk blue color will likely be changed to pink or yellow. And just like that, I can change the color of the house.


Essential Tinkering ToolsEssential Tinkering Tools
PS
See how it all began right here.
Thanks for reading!
xo
elyse