Sunday, August 2, 2020

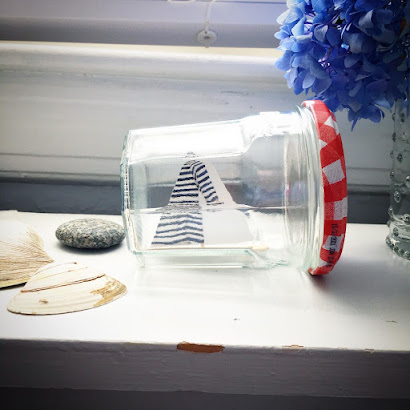
let's make a sail boat in a jar

Happy August! For those of you just tuning in, welcome to my Let's Make Sunday Series where I've resumed blogging to share easy projects using materials you are likely to already have at home. Some ideas presented 
are brand new and some I originally developed for either my craft books or magazine features. Please note that this is a fun side project – I jump right into the instructions without lengthy musings and most images are just snapped using my iPhone. Nothin' fancy here, just simple makes. Today's project is fresh spin on Ship in a Jar from Seaside Tinkered Treasures.


The idea is to craft a small sailboat and place it in a jar... or just display as-is.


Here's how it appeared in my second book {an all-time fave layout/photo). Today's version is even simpler as we're leaving the jar lid as-is and skipping adding beads as frothy waves, but of course, the options are yours!

You will need:
Jar
Glue
Paper
Scissors
Short craft sticks
Toothpicks


I am using gift wrap from Sara Fitz


Snip the tip off one end of the toothpick so that it is flat; glue it to the craft stick.


Judge what size you'd like the sail to be. Fold a piece of paper in half and cut out a triangle. Voila! You know have a template. Slide over folded paper for same sized sails every time.


Cut a small slit inside the fold of your sail so that it can slip over the toothpick mast; lightly apply glue, fold shut, and gently seal.


Now you're sailing!


So cute, right!? Tip: The little sail boats also make adorable place settings, party favors, table decor.


So easy and fun you could end up making an entire fleet for a little lockdown regatta!

Happy tinkering + please stay safe at home + well!

xo
elyse

Find me on Instagram at or Facebook

Sunday, July 26, 2020

let's make a cooking measurement magnet

Welcome to my Let's Make Sunday Series where I've resumed blogging to share easy projects using materials you are likely to already have at home. As much as we try to support our local restaurants, we are still doing most of the cooking at home. I used to have a magnet with liquid measurements on it that was always so helpful so I thought – let's make one for this week's project!


You will need:
Jar lid
Glue
Magnet (or low-tack tape)
Paper
Pencil
Scissors
I looked up the cooking measurements I wanted and typed them into a Word document. You may click and download the image above, then print, or create your own. You could also hand-write on to a piece of paper.

One one document, I tried two different type sizes (11 and 12) leaving plenty of space to cut around the text.

Instead of using a math compass, this time I flipped the jar over around the text, traced lightly with a pencil, and cut out the circle.

First I glued a plain white circle to act as a base, helping to make the circle with the text look brighter against a white background.


Finally, glue a magnet to the back and keep on the fridge! I couldn't find a stray magnet so my "kitchen helper" is stuck on with a loop of painter's tape (low-tack making it easy to remove anytime).

I'm terrible at remembering this pints-to-quart stuff so I think this is going to come in very handy!

Happy tinkering + please stay safe at home + well!

xo
elyse

Find me on Instagram at or Facebook


Sunday, July 19, 2020

let's make coasters

Welcome to my Let's Make Sunday Series where I've resumed blogging to share easy projects using materials you are likely to already have at home. I live in Rhode Island where it is currently summertime and cold drinks often require a coaster – so let's make some! No need to read three long paragraphs about summer and coasters and drinks, let's get right to it, shall we?

You will need:
Jar lids (I'm using lids from Bonne Maman preserves)
Cotton fabric
Math compass
Paper
Scissors

In a nutshell – or a lid – the goal is to cut a circle of fabric to fit the inside of a lid. 


Tracing the lid won't give the best fit so I decided to get out the ol' math compass.


Position the point of the math compass to the center of the lid and then extend the arm holding the pencil close the inner edge.


Keeping the math compass "frozen" in position, move it over to a piece of paper {I'm using this cute handy pad from E. Frances}, position point-down and rotate the pencil to draw a circle. Cut out the circle to be your template. Use your template to cut as many fabric circles as you'd like. No math compass? No worries. Trace the bottom of a glass similar in size to your jar lid or just estimate – it will be fine.


Place the fabric circles into the lids and voila! Your summer coasters are complete.


I chose NOT to glue the fabric to the lids to keep them easy to remove to replace and wash, if needed.


If you are swooning over the fabric, I've had it for a while and it is Rambling Rose, Cherries, Blue from Tanya Whelan.


So cute, easy and fun, right!? Happy tinkering + please stay safe at home + well!

xo
elyse


Find me on Instagram at or Facebook 

Saturday, July 11, 2020

let's make a jar lid wreath

Happy Saturday! Welcome to my Let's Make series {posted a day early} where I've resumed blogging to share easy projects while we're all spending so much time at home. As you may have noticed, in my home we consume a lot of Bonne Maman preserves. (This is not a sponsored post but imagine!?) Not only are the preserves so yummy and very much like homemade but the jars are perfect for storing things, the labels are easily removed, and the lids are gingham! Because of this sweet "total package" I tend to keep each emptied jar and lid and while I've been using the containers as vases, the lids have started stacking up. It was time to tinker!


I decided to make a wreath. I first tried overlapping the lids and hot-gluing them together but the glue didn't hold and things got messy. Still, next, I tried hot-gluing lids to an embroidery hoop which served as a round base – didn't work. I then tried fashioning a web of tape to the back of the wreath shape – didn't work. 


I decided to try super glue aka Loctite Instant Adhesive QuickTite. It was my first time using the stuff and as a messy crafter, I was nervous about gluing my fingers together. While I did get it all over my fingertips (which washed away in a couple of days) it did indeed bond the lids together. 

You will need:
6-12 jar lids
Loctite Instant Adhesive QuickTite
Painter's tape


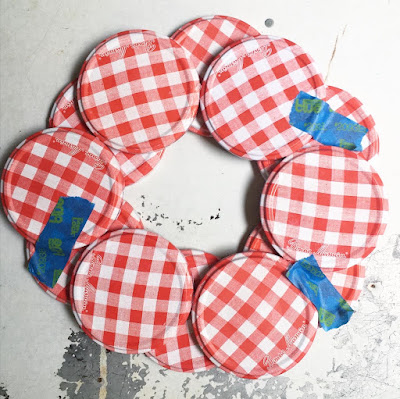
Rather than overlapping all lids, I made a daisy shape and it worked, so I glued another = two daisies.


I placed one daisy over the other and rotated it slightly. When it was positioned how I wanted it, I taped the two daisies in place with painter's tape – knowing I wanted to flip it all over for gluing so that any gluey spots would be hidden. I used painter's tape so that it would be easy to remove.


{I'm not one for perfection with my crafting and that's why I refer to it as tinkering}


I added glue to spots where lids connected, pressed gently, and rotated to glue the next spot.


Once all the gluing was done, I removed the tape from the front. It worked! The little metal wreath was complete, shown hanging from a trip of fabric.


The gingham makes it charming for the summertime but also for holiday decorating. But let's not get ahead of ourselves!

Happy tinkering + please stay safe at home + well!

xo
elyse


Find me on Instagram at or Facebook 

Sunday, July 5, 2020

let's make faux milk glass

Happy July! Welcome to my Let's Make Sunday Series where I've resumed blogging to share easy projects while we're all spending so much time at home. It's been way too long since we tinkered with jars so for today's make, they're back!

This project originally appeared in my first book, my baby girl, Tinkered Treasures on page 70 as "painted jars" but because the result resembles milk glass, I decided just now to change the name for this post. Brazen, I know! While milk glass is typically white, depending on what paint you have on hand, you can make your own rules.

You will need:
Jar with lid
Paint (interior house, or craft)

Optional:
Pretty paper, scissors, glue
Trimming


As always begin with a glass jar that is clean and dry. The object of the game is to cover the interior of the jar with a thin coat of paint and let it dry, so you don't want to pour in too much, although you can always pour excess back out.


Return lid to jar and roll around to cover inside with paint until no glass is exposed.


Leave jar open and allow the paint inside to dry. 


Cut out a motif from a favorite paper and affix to the outside of the jar using a bit of glue.


Add trimming and secure with glue, if you like, or leave plain. The jars are best used to hold dry objects; I generally tuck a cupcake wrapper inside to serve as a liner.


Now that I've rethought this project as milk glass, I want to make some using white paint or a jadeite shade of mixed white and green! Turquoise would be fun, too.

Happy tinkering + please stay safe at home + well!

xo
elyse

If you haven't already, find me on Instagram at https://www.instagram.com/elyse.press.major/ or Facebook at https://www.facebook.com/ElyseMajorTinkeredTreasures

*Looking for copies of my books? Please consider first checking your local independent bookstore or try Barnes & Noble before buying from a big retailer like Amazon. Shop small, buy local.

Sunday, June 28, 2020

let's make coastal accents with seashell pasta

Happy Summer! Welcome to my Let's Make Sunday Series where I'm sharing easy peasy projects. I live in the Ocean State and love spending time not only at the beaches but wandering the local stores. Aside from t-shirt shops (I have way too many whale and anchor-motif long-sleeves) my faves are places that sell either beautiful coastal decor or on the other end of the spectrum – kitschy souvenir shops – the junkier the better! If your summer vaca plans look a bit different this year, you can still make yourself some seaside accessories and here's how:


One of these things is not like the other. Can you guess which one? It's the can – covered in sea shell pasta and spray painted white!

You will need:
A base (tin can, flat frame, foam wreath, etc.)
Seashell pasta
School glue
White spray paint

Attach shells with glue, let dry, and then bring outside to give a few coats of white spray paint. Here's a step-by-step from the Camp Tinker archives: click here.


Here's a mirror from IKEA given the seashell pasta treatment.


This project was meant to be in my second book Seaside Tinkered Treasures but didn't make the trek to the UK in one piece despite two shipping attempts! Use the same application of shell pasta and glue and white spray paint on a styrofoam wreath form.


People mistake this for real shells most every time! Use to hold pens, flowers, plastic cutlery... what a fun idea to decorate for the Fourth of July!

Happy tinkering + please stay safe at home + well!

xo
elyse

*Looking for copies of my books? Please consider first checking your local independent bookstore or try Barnes & Noble before buying from a big retailer like Amazon. Shop small, buy local.


Sunday, June 21, 2020

let's make cottage style god's eyes

Happy Summer! Welcome to my Let's Make Sunday Series where I've resumed blogging since March to share easy projects. Many of us will be having a home-based summer and need to find ways to make the everyday special, so my plan is to post grown-up twists on summer camp faves. As always, the makes presented will be simple and fun, using things you are likely to already have or are not difficult to find. 

Welcome to Camp Tinker! Today we're making that staple of summertime arts and crafts: the God's Eye or Ojo de Dios. To give it cottage style or a shabby spin, we're using strips of cotton fabric instead of yarn or twine resulting in a rustic home accent.


You will need:
2 sticks or twigs
Scissors
Scraps of fabric


I foraged around outside and found a nice thin stick which I snapped into two equal pieces.


Prep
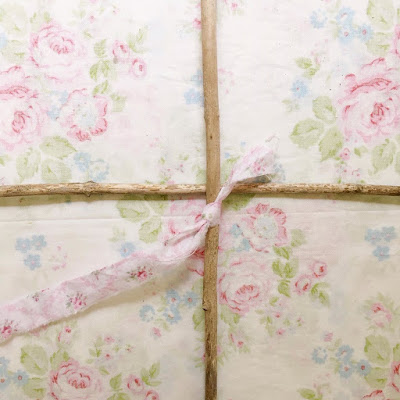
Next, I snipped the edge of a length of fabric and tore a strip about a half inch wide. You will need many of these strips – which you can prep by tearing all at once – or rip along as you go. Tie each fabric end to the next and knot resulting in a single long strip. Place the sticks into an equal cross. Tie the fabric strip into a knot at the center of one of the sticks


Working clockwise from the center knot, wrap the fabric around the stick, rotate and do the same to the next stick. Once you begin to get the hang of it, it will be like turning a steering wheel, wrapping the fabric around and under as you go.


I hope these images will help but if they don't – there are many tutorials to be found with a simple Google search. They will most likely use yarn but the method is the same.

I didn't want my finished piece to be too large, so I snapped all four branch ends. Once completed, I knotted the final strip to another piece hidden in the back. Tie a final fabric strip to one of the sticks and knot into a loop for hanging. 


The resulting woven pattern is very pretty. I used a few different fabrics, mostly pinks and whites with rose motifs, but the possibilities are endless.

Happy tinkering + please stay safe at home + well, campers!


xo
elyse